What is 3D Crowd Covid-19 Volunteer Printing?
Dan and Jim: We’re in a group of volunteers producing protective visors for use in the NHS. This includes many people 3D-printing the visor frames at home in their spare time. Each person delivers their frames to a local hub where the transparent visor “window” and elastic are added before delivery to the NHS and care homes in the local area.
The visor is allowed to be used by the NHS due to a medical device approval issued by the Czech Ministry of Health. So far, our 8,000+ volunteers have produced over 180,000 visors that have been delivered to the NHS and care homes..
How does a 3D printer work?
Dan and Jim: A 3D model is created using CAD (computer aided design) to define the 3D exterior shape of the component being made. This is then inputed into CAM (computer aided manufacturing) software called a “slicer”. Based on up to dozens of settings which the user has to give, the slicer produces a file called “g-code” which tells he printer the way the component is to be printed, by printing the component in a series of flat layers, one of top of the other
The printer has a flat bed onto which the component is printed from a long filament of polymer which is melted and pushed through a small print nozzle. Using three stepper motors, the position of the nozzle relative to the bed is controlled about the three Cartesian axes X, Y and Z. A fourth stepper motor uses a knurled wheel to push the filament along a Bowden cable (like for a bicycle brake) through the nozzle. One fan is used to control the rate at which the printed filament cools and another to produce a very sharp temperature gradient at a point immediately upstream of the nozzle (at the “heat brake”) to provide a very specific transition zone between solid and melted plastic which helps prevent filament further upstream of the transition zone softening too early and jamming. The printer prints onto the bed first, then jumps up very slightly (e.g. 0.2 mm) on the Z axis and prints the next layer and so on.
While the route the nozzle takes relative to the bed is calculated by the slicer software, the user has to choose the temperature of the nozzle and how this is varied with height, the temperature of the bed, the control of the component cooling fan throughout the process, the height of each layer, the speed the nozzle travels at, the speed the filament stepper motors pushes at and how much the filament is retracted backwards and how fast, even with how much acceleration, between printing steps.
These printers are rather fiddly to set up therefore and until good settings have been proven many print failures can happen!
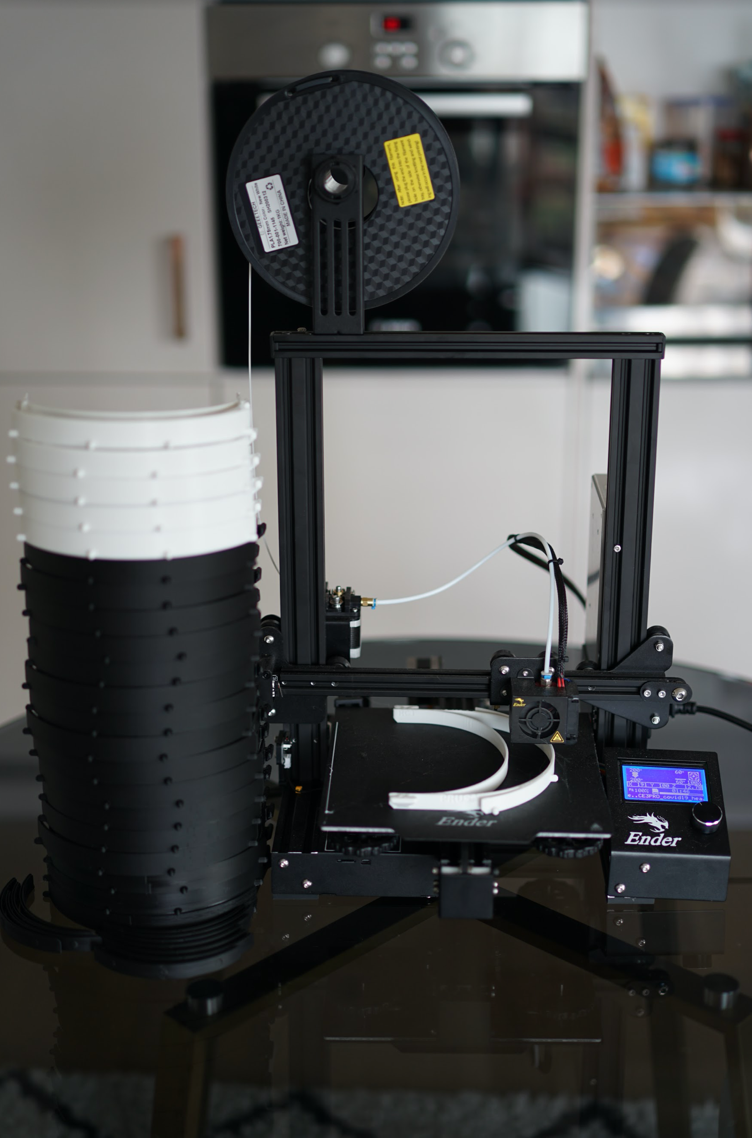 Dan's printer, working hard in his kitchen
Why are you doing this?
Jim: I’ve taken the wise advice in one of Gwilym’s Jostle posts to stay connected with my friends. One of my busiest WhatsApp groups is for university friends many of whom are doctors, some vets. I’ve seen the stress our frontline medics are under. So, I’m printing to support these medics working, some vulnerable and in danger, across England, Wales and Ireland to keep us and our animals on the road: Ann, Babe, Bazzer, Bill, Cal, Caroline, Ceril, Claire, Dave, Fark, Hog, James, Liesl, Paddy, Pete, Rob, Sammy, Siobhan, Tom & Warren.
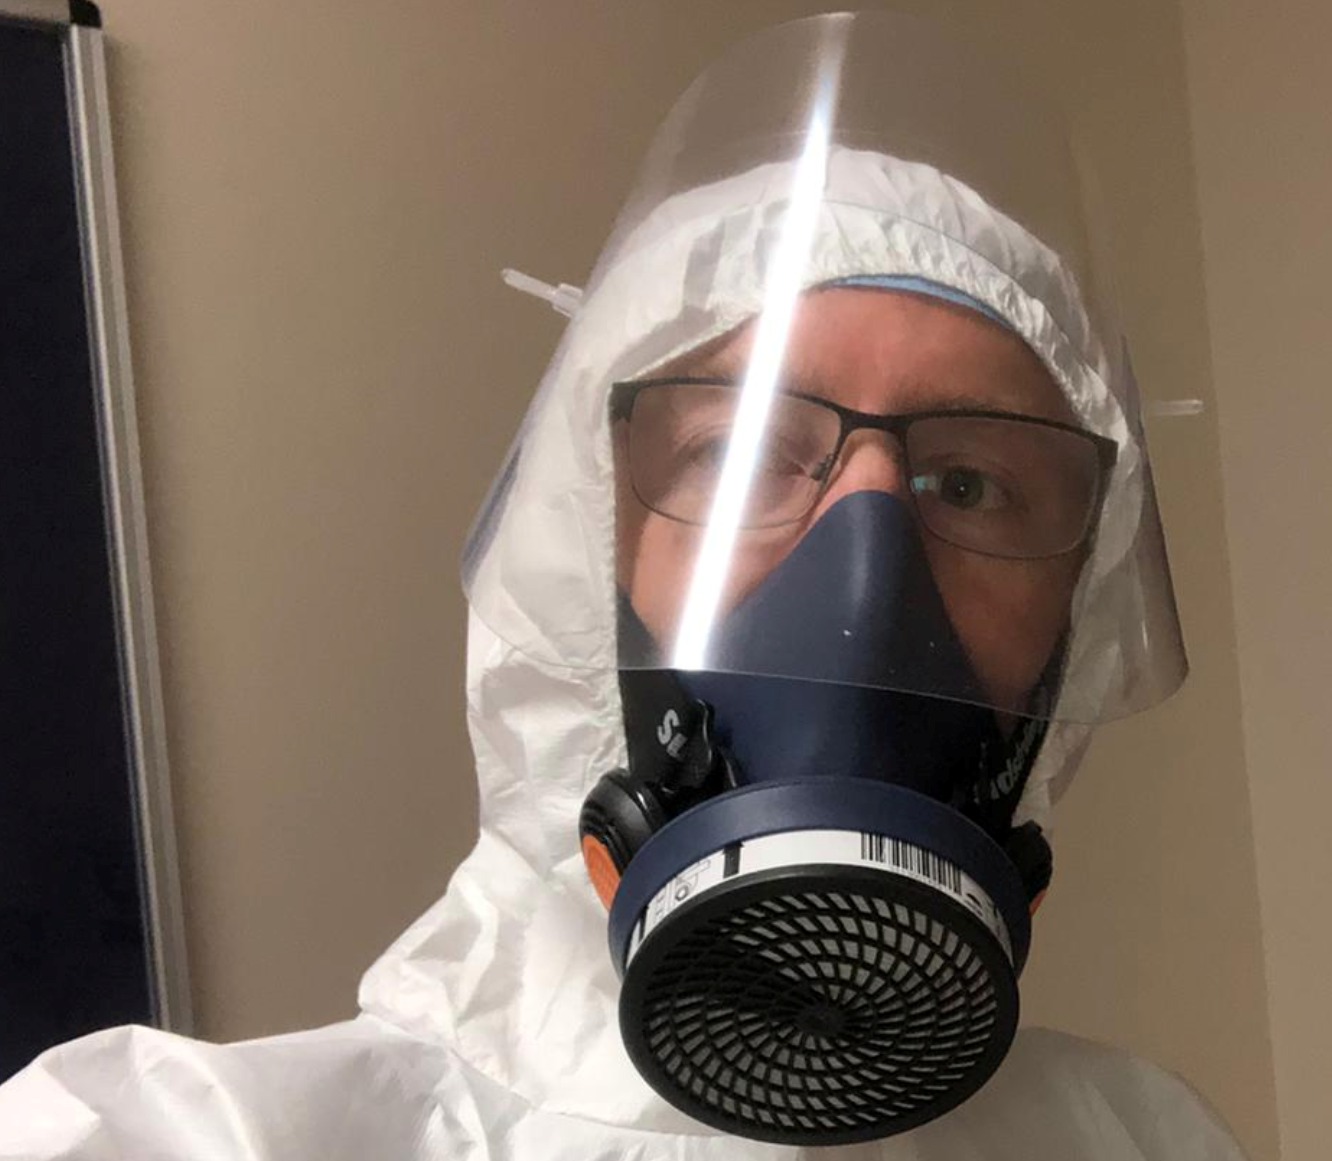
Dave modelling a visor that would be misted up for 4 hours and was driving him mad as once on he could not touch it with his hands. He said a tickly nose for 4 hours was also serious torture. Dave’s a consultant A&E anaesthetist. It’s Dave who puts the drugs into you that keep you alive when you arrive seriously poorly in A&E, e.g. after a car crash. Dave’s wife Ann is a GP and has therefore also been exposed in the front line against Covid
Well after Rob, in the far north of England, had raised the alarm for Covid for me by explaining the likely exponential growth we were later to see, these medics gave me a series of triggers to start visor building: Paddy, who has run across the Sahara with no problems, messaged that he was getting too hot while operating; Dave said his current operating theatre visor was no good as it was misting up.
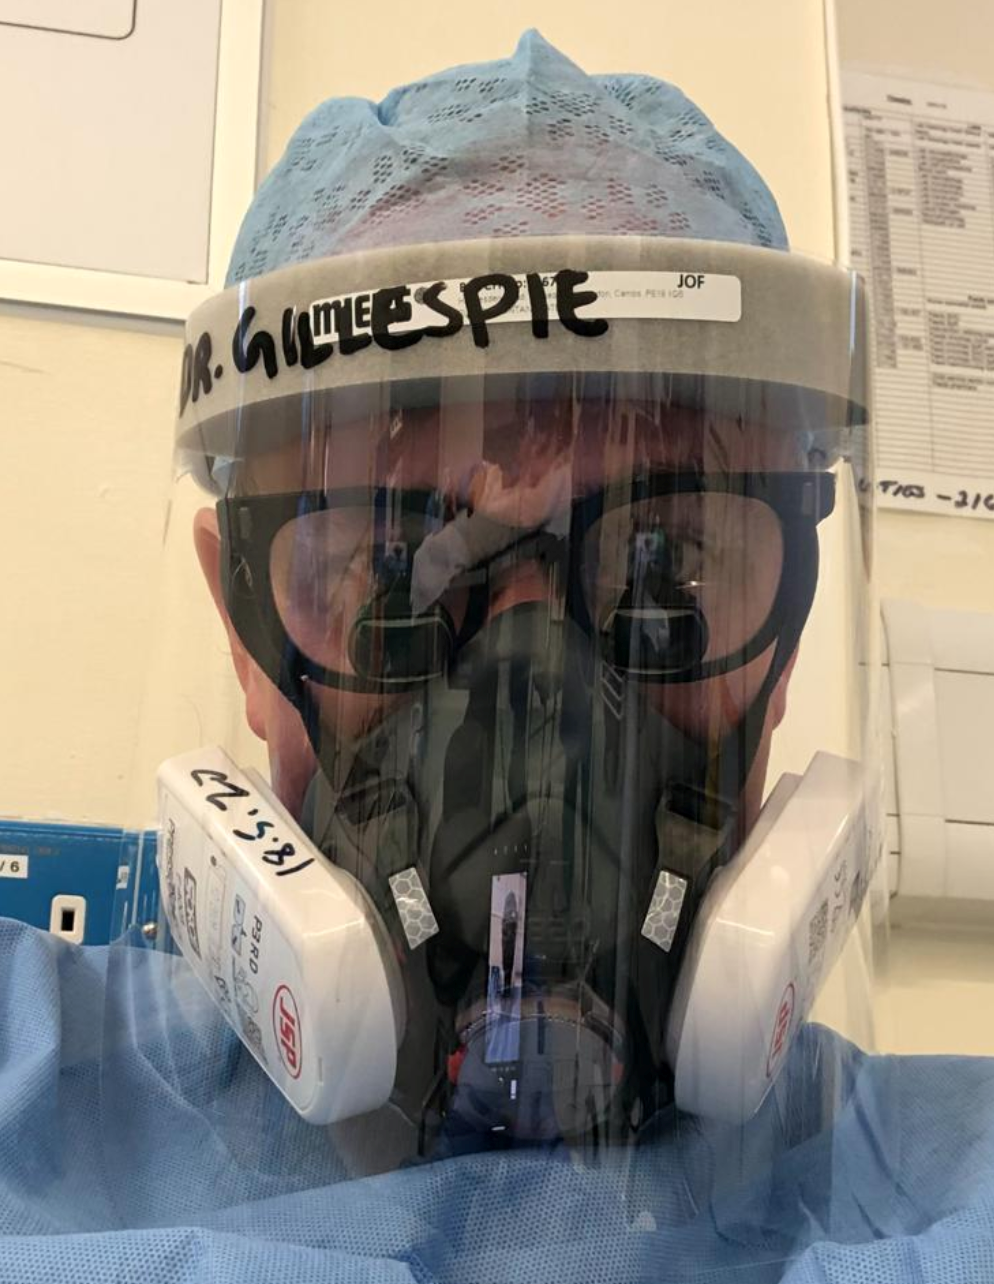
Paddy, Chief Plastic Surgeon at Addenbrookes, University of Cambridge Hospital, modelling a high quality visor in late May
Then Sammy texted me in a rush that she could not attend an online sailing club AGM as she had run out of energy as the hotel near the hospital had no kitchen working, she could not go home or into shops and had to go back to her hospital for food. It was the fact that someone I have known for 35 years (having raced sailboats together since we were just 16 years old) who makes life and death decisions for children every day – she is very reliable - had got the meeting date wrong that showed me the massive stress and fatigue she must be under.
The huge extent at which the NHS were getting through PPE was shown by Paddy advising that Addenbrookes (University of Cambridge Hospital) were down to only 11 working operating theatres which were nevertheless getting through 2,000 masks per day (half a million a year) as everyone in every theatre had to have a new mask after every patient’s operation. That was just the operating theatres and not the wards, outpatients or A&E. Finally, Pete and Paddy both said they were worried about vision through their visors while performing intricate surgery. I contacted Dan for advice, as I knew he had 3D printer experience, and ordered my printer from Amazon that day.
Dan: I’ve been tinkering in 3D printing since backing a Kickstarter project in 2012, right back in what seemed at the time almost the very beginning of home 3D printing (although commercial machines have been printing for decades!), back when they were very much more expensive than they are now, and I have owned a couple since. After Jim contacted me, and having sold my previous printer, the idea of being able to contribute to the coronavirus effort in whatever little way I could, started to grow on me and a couple of days later I bought the same model Jim bought. I’ve needed the help of the NHS in the past and this seemed like a great opportunity to give something back. I was also aware that because of exponential growth, saving just one person from getting the virus is likely to save about 2 other people who would otherwise have got it, who themselves each save another 4, and so on. In this way, printing face shields seemed like a very small way to potentially make quite a large difference.

Jim's printer, running in his workshop with childhood hero James Hunt, the F1 World Champion, overseeing operations
Which material are you printing in and why?
Jim: I’m using PETG. Its polyethylene terephthalate which has been glycol-modified to lower its melting temperature so it can be printed on a home printer. PETG has relatively high strength, flexibility and durability and is essentially the Rolls-Royce material for NHS products as it is accepted as food safe. The trade-off is that it is harder to print than the alternative, PLA. PETG seems to be very “sticky” with a fairly high surface tension which can result in very fine hairs being stretched between different parts of your component by the printer head. It has taken me a month to get on top of this.
Dan: I’ve chosen PLA, mainly because I have had experience with PETG and know how much more difficult PETG can be! Although PETG is preferred by the NHS, partly because it can be washed in hot water if needed without the risk of the material deforming (although, any PPE should only be worn once), but with PLA I can reliably and consistently print larger volumes right from the start without any potential downtime tuning the printer’s setting.
Which printer are you using and why?
Jim: The Creality Ender 3. It is the cheapest 3D printer available which has a big enough bed to print PPE visors.
Dan: Same as Jim.
What upgrades have you made to your printer?
Jim: PETG needs quite a high nozzle temperature and this can damage the standard Bowden cable leading from the extruder stepper motor to the print nozzle. I have fitted one with a higher melting temperature, of a more slippery PTFE and with a smaller internal diameter to reduce backlash between the extruder and print nozzle when the extruder changes from pushing filament out to retracting it back and vice versa.
I have also fitted a meatier extruder drive, which pushes the polymer filament better when the nozzle is set only just above the filament’s melting temperature.
I have also fitted nice adjustment wheels under the bed for adjusting the height of its four corners relative to the origin of the axes (especially the Z axis) for the nozzle zero position.
I am using a new glass print bed too. This is almost perfectly flat, a very good thing for getting the first layer well bonded onto the bed.
I have a heater box to maintain my filament at a good temperature and humidity plus a tent-like enclosure which the printer lives in so that it does not suffer from cold drafts while working.
I have also replaced the main board with one that has 32-bit processing and 256 micro-steps per stepper motor step which makes the printer much quieter. Unfortunately, the new firmware seems to have a bug stopping some features from working properly. Naturally, as a mechanic by training, I did not read the instructions while upgrading the board, resulting in me switching the PCB board connections to two of my printing fans, with dire printing results!
Dan: I’m running mine almost completely stock at the moment. I do have a glass bed to be installed but, as the prints are coming out great without it, I may leave it until the demand for the face visors settles down a bit before I install it.
I’ve flashed the stock electronics board with a bootloader and new firmware (Marlin 2.0) which, as well as thermal runaway protection, adds a new Mesh Bed Levelling feature which has meant I’ve been able to get away with the very warped aluminium bed the printer came with.
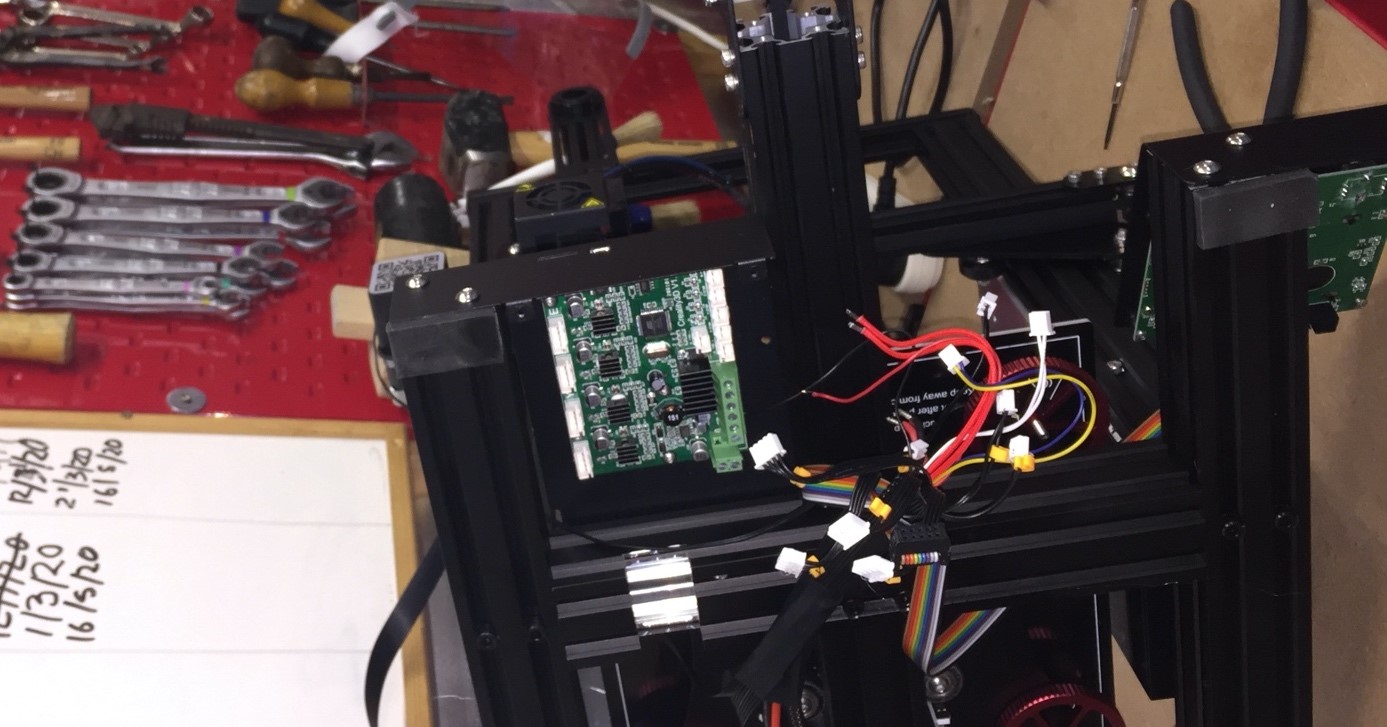
WARNING: Mechanical engineer plays electronics. Jim upgrades the main PCB! He plugged MOST of the connectors back into the right ports
What upgrades would you still like to make?
Jim: It would be handy if my printer could join my network since at the moment I have to communicate with it via an SD card. I would also like to install mesh bed levelling which helps make the bed more level.
Dan: I’m hoping to eventually make a lot of the upgrades Jim has made to his, including the slipperier and tighter-toleranced PTFE tubing for the Bowden assembly. I’d quite like a new main board too, simply because it makes the stepper motors a lot quieter - I think the people in the flat above me must be wondering what’s going on with it sounding like R2D2 is on the balcony below them. Another really useful upgrade is a bed levelling sensor, these are able to probe the bed at a number of points to establish the exact height of the bed at each point and compensate for this in software and this help with first-layer adhesion and helps prevent particularly large prints from popping off the bed mid-print.

A close up of Jim's printer in operation
How many “prototypes” did you try to print before getting to a high enough quality for NHS?
Jim: Ten, four of which were not good enough for the NHS but are now in use by my family.
Dan: Two, I think. My slicer generated some g-code on the third attempt that produced an incredible print for some unknown reason so I’ve just been running the same g-code ever since.
How many items have you printed for the NHS? And what rate do you print at?
Jim: I have made 30 and am able to print frames at about 7 per week. The maximum I could possibly make, at a lower quality, would be 28 per week.
Dan: Each of my prints is taking 2hr 45, so I can print about three or four per day. Currently on 23 in total.
Which area of the country are you supplying?
Jim: My local hub that I supply is run by a volunteer school teacher inside a village hall near Hook, in North East Hampshire. It’s there that the windows and elastic straps are added to the frames that I print. These are then sent out to the rough area of Hampshire, Berkshire and Oxfordshire. I write this just after the holiday weekend at the end of May during which 1000 visors were assembled by a team in the village hall for this region.
Dan: My hub is quite central East London so I presume mine are going out to London Hospitals.
How many hours work did you put in before making your first successful print? And how many hours of tuning your printing software since?
Jim: Assembling the printer took me 5 hours. I then spent 5 hours “reading up” on YouTube how it works as it came with no instructions. I believe it took me another 20 hours of programming of the slicer before I had tuned up my prototypes properly.
Dan: Assembling mine took about 5 hours too (although would have been three had I known what the eccentric nuts that ride along the extruded aluminium sections of the frame do!). I managed to find a slicer profile on a Facebook group who are also printing the visor, so I was printing almost immediately after that.
How many hours of work does each print now take you?
Jim: It takes me only 5 minutes to remove the last print and set the next one off. Each one takes 6 hours to print. I am printing PETG at up to 255 deg C at the nozzle and 70 deg C for the bed: although it can take a few minutes for the printer to heat up therefore, I have installed software code in my CAM software’s slicing machine code which authorises both heaters to work simultaneously at start-up instead of the stock sequential heater start (the bed followed by the nozzle) as the power supply is big enough to do this on such a small printer. This mod saves a few minutes.
Dan: Printing in PLA makes it easier to remove prints from the standard print bed, so it probably takes maybe 10 seconds to remove a print (just grab it by a corner and pry it off) and maybe about another minute for the heated bed and nozzle to get back up to the proper printing temperature (220 deg C for the nozzle and 60 deg C for the bed for PLA), ready for the next print. I also periodically check up on the printer to make sure it’s not inadvertently printing a bird nest of filament instead. Print time for me is 2hr 45 mins each.
What are the most difficult challenges you have faced in getting your printer to work?
Jim: I have had several periods in which my adhesion of the component to the bed has not been good enough. Several examples have simply popped off the bed after about half an hour to one hour of running, causing a spaghetti-like mess to be made! I am now printing the first few layers quite hot (255 deg C) with the cooling fan switched off and I am also printing what’s called a “brim” on the bed around the component, giving a much higher surface area to keep it adhered onto the base. I am also printing with my enclosure tent closed so that the air round the component stays quite warm (about 30 deg C) to avoid temperature differentials and thus bending that could crack the component off the base.
My biggest recent challenge has been a simultaneous main board and extruder drive upgrade. I was getting terrible prints after this!
Although I had correctly calibrated the new extruder drive I did not know this at first. It took me about 4 hours to work out that the firmware on the new board came with a software bug in it causing the bed not to be level. It then took me about 5 hours to attempt and fail to compile new firmware for the new board as the compiling software crashes for reasons I still cannot work out. I am printing fine again now after disabling the bed levelling feature of the new main board.
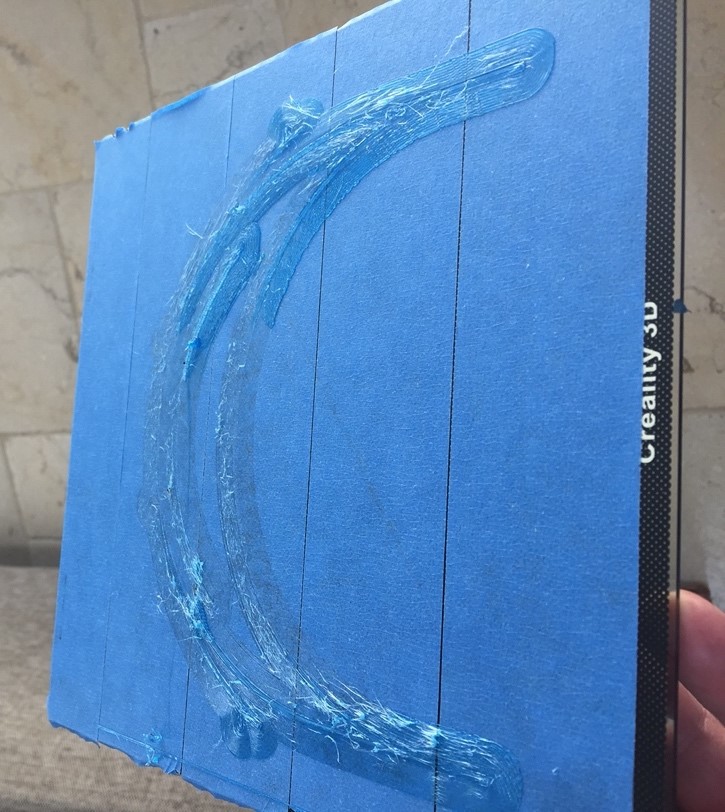
Failure: a common sight when one or more print settings are wrong.
Dan: A couple of nozzle jams which have been solved by cleaning the nozzle tip while still hot (quite a high risk of burning yourself!) and by doing a “cold pull” whereby you allow the nozzle to cool slightly and then manually pull the filament up out of the top of the extruder – the slightly melted plastic grabs hold of any microscopic impurities in the nozzle which may be causing the jam.
What are the best printing tips you have learnt from each other?
Jim: Dan has taught me almost everything that I needed whenever I got stuck.
A marvellous trick of his was to rotate the component 90 degrees in the CAM slicing software, which had halved his print time down from over 5 hours to under 3. Sadly, it didn’t seem to shave a lot of time off for me, perhaps 20 minutes. We have no idea why!
Dan’s also given me a huge set of amazing instructions on how to upgrade my firmware – this is very boffin-like involving a temporary printed circuit board and some very odd electronics. My attempts to date at firmware upgrades have not worked due to software compiling errors that I cannot yet debug!
Dan: Jim’s given me a very useful list of printer upgrades that have helped solve some of the known issues with the Ender 3 printer and recommended which parts to buy. He’s also introduced me to the 3D Crowd group and has shown me that high quality printing in PETG is in fact achievable!
Why has 3D crowd printing worked in this role and will it continue?
Jim & Dan: 3D printers can print large enough products in sufficiently robust materials and are easily available to obtain during lockdown, i.e. online. The 3D CAD model of what is needed has been freely shared online too. 3D printers are an ideal rapid prototyping tool: unlike production injection moulding tooling, it can take only minutes to implement a new design or make a design upgrade and restart production, compared to weeks or months for injection moulding. 3D printers have therefore been very quick off the mark. The mask we are printing is already on its third publicly-released version, and the design now seems finalised, established and certified by various healthcare bodies worldwide – something would not have been achievable in such a short timeframe in the past.

Success: Jim models a completed visor
“Big manufacturing” is now coming online in the UK with injection moulding of visors, a much faster form of production once the production tooling has been designed and produced. In a relatively Herculean effort, it took only 4 weeks – something that can easily take 6 months – for Jaguar Land Rover (JLR) to get their visor production injection moulding tooling built.
These tools have recently come onstream alongside JLR’s own 3D printers at Gaydon, Warwickshire and are able to “bash out” 14,000 visors per week, so we are now likely to see a reduction in the demand for home-printed visors.
The two of us are now only adding 0.25% of capacity on top of JLR’s production rate, although our volunteer force of people at home is large and quite recently was reporting that it had “orders” for ¼ million more visors.